Coconut Lovers' Guide: Perfect No-Bake Rice Krispie Treat Tips
For those who dream in hues of tropical beaches and can't resist the sweet, nutty aroma of coconut, prepare to meet your new obsession: homemade
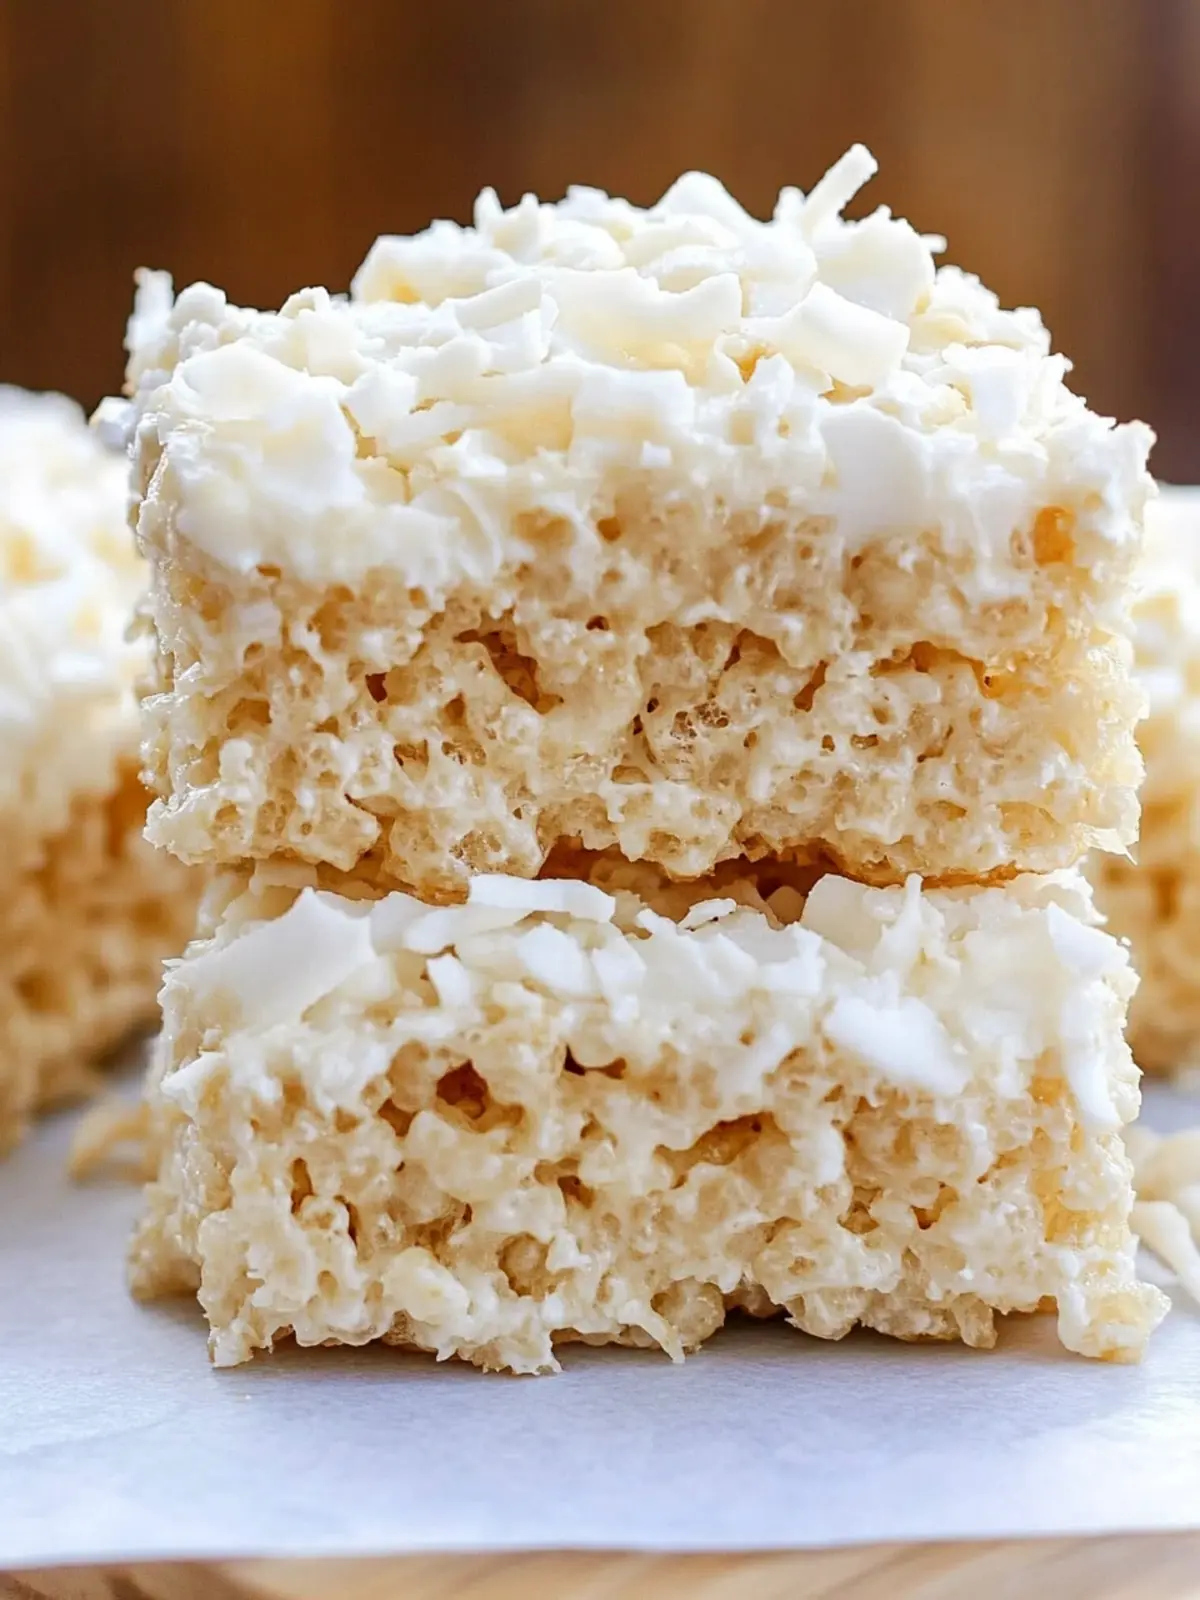
coconut rice krispie treats. This isn't just another no-bake dessert; it's a meticulously crafted symphony of chewy, crunchy, and irresistibly sweet flavors, elevated by the distinctive magic of coconut. Forget bland, hard, or crumbly cereal bars – we’re talking about a treat so perfectly balanced, so wonderfully gooey, that it will forever change your perception of what a simple rice krispie treat can be. If you're ready to indulge in a snack that truly delivers on its promise of tropical deliciousness, this comprehensive guide is your passport to perfection.
The Irresistible Allure of Coconut Rice Krispie Treats
Why do
coconut rice krispie treats hold such a special place in the hearts of dessert enthusiasts? It’s the seamless marriage of two beloved textures and flavors. On one hand, you have the comforting, nostalgic chewiness of a classic rice krispie treat, abundant with fluffy marshmallows and crisp cereal. On the other, the vibrant, exotic essence of coconut transforms this familiar favorite into something truly extraordinary.
Imagine sinking your teeth into a perfectly formed bar: the initial gentle resistance gives way to a soft, stretchy interior, studded with pockets of melted marshmallow and fragments of crunchy toasted coconut. Each bite is a delightful contrast, offering both the wholesome crunch of puffed rice and the tender chewiness that signifies a well-made treat. The infusion of coconut flavor, both subtle and pronounced, creates a truly unique profile that is refreshing yet deeply satisfying. These are not just snacks; they are moments of pure, unadulterated joy, simple to make but complex in their delightful impact.
Crafting Perfection: Secrets to Unforgettable Coconut Rice Krispie Treats
The path to an extraordinary
coconut rice krispie treat lies in understanding a few fundamental principles that elevate them from good to truly phenomenal. It’s all about balance, texture, and, of course, maximizing that glorious coconut flavor.
Achieving the Ideal Texture – No More Roof-Scratchers!
The hallmark of a truly great rice krispie treat is its texture: perfectly firm enough to hold its shape, yet soft, stretchy, and incredibly chewy, never hard or brittle. This delicate balance hinges on a few crucial elements:
*
The Marshmallow Method: This is arguably the most critical secret. While it might seem counterintuitive, you don't melt *all* your marshmallows at once. The majority are melted with butter to create the sticky base, but a significant portion (roughly two cups for a standard batch) should be reserved and stirred in *just* before the cereal is fully combined. These "late addition" marshmallows will melt just enough to bind everything beautifully but will retain their pillowy softness, creating delightful pockets of gooey sweetness throughout the treats. This technique guarantees an incredibly soft and chewy result, ensuring every bite is a dream, not a dental hazard.
*
The Light Touch: When spreading the mixture into your prepared pan, resist the urge to press down hard. Heavy-handed pressing compacts the cereal too much, resulting in dense, hard treats. Instead, press as lightly as possible, just enough to gently spread them evenly across the pan. A light touch ensures air pockets remain, contributing to that desired stretchy, soft texture. Using hands lightly coated with non-stick spray can make this process incredibly easy and prevent sticking. For a deeper dive into achieving that perfect consistency, check out
The Secret to Perfect Coconut Rice Krispie Treats: Chewy & Gooey.
*
Ratio Matters: Don't skimp on the marshmallows! It might seem like an excessive amount initially, but the generous quantity is key to achieving that supremely gooey, stretchy consistency that defines the best rice krispie treats. The ratio of butter, marshmallows, and cereal is a delicate dance; stray too far, and you risk a dry or overly sticky outcome.
The Coconut Factor – Infusing Tropical Bliss
What truly sets these treats apart is their vibrant coconut essence. It's not just an afterthought; it's deeply integrated for an authentic tropical experience.
*
The "Secret" Extract: The real game-changer for intensifying coconut flavor is a good quality coconut extract. Adding a teaspoon or two to your melted butter and marshmallow mixture ensures that sweet, aromatic coconut taste permeates every single bite. Do not skip this! It provides a depth of flavor that toasted coconut alone cannot achieve.
*
Toasted Coconut for Texture and Depth: While the extract handles the foundational flavor, toasted shredded coconut adds incredible texture and a more complex, nutty coconut taste. Sweetened shredded (or flaked) coconut, often found in the baking aisle, is ideal. Toasting it on the stovetop or in the oven until golden brown amplifies its flavor significantly. Just watch it closely, as it can burn quickly! Mixing a generous amount into the treats provides lovely chewiness and visual appeal. For more on this, you'll love
Toasted Coconut Rice Krispie Treats: Your New Favorite Easy Recipe.
*
Coconut Oil Alternative: For an even more pronounced coconut flavor, consider substituting a portion or all of the butter with virgin coconut oil. This swap not only enhances the tropical notes but also contributes to a slightly different, equally delightful texture.
Mastering the Method: A Step-by-Step for Coconut Perfection
Creating these delectable
coconut rice krispie treats is remarkably simple, but following these steps ensures optimal results every time.
1.
Gather Your Ingredients: Ensure you have fresh mini marshmallows (they melt best), fresh puffed rice cereal (stale cereal makes stale treats!), sweetened shredded coconut (toasted), good quality butter, and, crucially, coconut extract.
2.
Toast Your Coconut: If you haven't already, lightly toast your shredded coconut. Spread it evenly on a baking sheet and bake at 300°F (150°C) for 5-10 minutes, or toast in a dry skillet over medium-low heat, stirring constantly, until fragrant and golden. Let it cool completely.
3.
Melt the Base: In a large pot over low heat (or in a microwave-safe bowl), melt the butter. Once melted, add the majority of your marshmallows (reserving the 2 cups for later) and the coconut extract. Stir continuously until the marshmallows are completely smooth and melted. Low heat is essential here to prevent the marshmallows from becoming too stiff or grainy.
4.
Introduce the Coconut and Cereal: Remove the pot from the heat. Gently fold in the puffed rice cereal until it's mostly coated. Now, quickly stir in the reserved 2 cups of marshmallows and the cooled toasted coconut. Stir just enough until these new marshmallows begin to soften and become slightly gooey, dispersing throughout the mixture, and the cereal is evenly coated.
5.
Press and Set: Lightly spray an 8x8 or 9x13 inch baking pan with non-stick spray. Transfer the mixture to the pan. Using hands lightly sprayed with non-stick spray, or a piece of parchment paper, gently and *lightly* press the mixture evenly into the pan. Remember, light pressure is key for that chewy texture!
6.
Cool and Cut: Allow the treats to cool completely at room temperature, which usually takes about 1-2 hours. Once firm, cut them into squares or rectangles and prepare to be amazed.
Storing and Enjoying Your Coconut Creations
To ensure your
coconut rice krispie treats retain their perfect chewiness and flavor, proper storage is essential.
*
Room Temperature Reign: Once completely cooled, store your treats in an airtight container at room temperature. They are best enjoyed within 3-4 days, remaining delightfully soft and chewy. Avoid refrigeration, as this can make them hard and diminish their texture.
*
Freezing for Future Feasts: Yes, you can freeze cereal treats! To do so, wrap individual treats tightly in plastic wrap, then place them in an airtight freezer-safe bag or container. They can be frozen for up to 6 weeks. When ready to enjoy, simply thaw them at room temperature for about 15-30 minutes. Freezing is a fantastic way to extend their shelf life and have a delicious snack ready whenever a craving strikes.
These
coconut rice krispie treats are more than just a recipe; they're an experience. They are a testament to how simple ingredients, combined with a few clever techniques, can create something truly extraordinary. Whether you're a lifelong coconut enthusiast or simply looking for a new twist on a classic no-bake dessert, this guide provides all the tips and tricks you need to create a batch of treats that will be remembered long after the last crumb is gone. Get ready to embark on a tropical snacking adventure!